XMLports in Microsoft Dynamics NAV 2017 are used to export or import data between an external source and a Microsoft Dynamics NAV database. Sharing data between different computer systems is seamless when it is shared in XML format. Working with XML files can be tedious so the details of how the XML file is handled are encapsulated in XMLports.
To use an XMLport to import or export data, you first design the XMLport in the XMLport Designer window and set some properties.
XMLports are conceptually related to dataports because they are object types that can import and export data. The difference is that the data in XMLports is encapsulated in XML format. This makes it possible to exchange information between different computing systems in a streamlined way.
Demonstration: Assuming you have been assigned the task of posting multiple customer journal lines as seen below. You have received these lines in CSV format. You can use XMLPorts to post these at once.
 |
| Fig 1: Import to Microsoft Dynamics NAV |
Creating an XMLPort in Microsoft Dynamics NAV 2017
If you are a developer of Microsoft Dynamics NAV, you can follow these steps to create an XMLPort from the development environment. Go to the development environment and open the database you want to modify. Go to XMLPorts object.
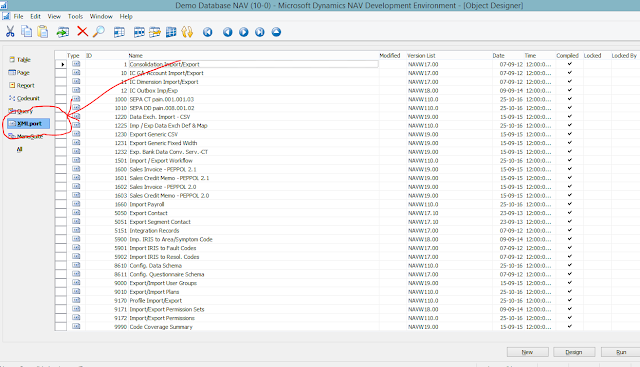 |
| Fig 2: XMLPort - Development Environment |
Go to File and select
New.
Fill in the fields as seen below:
In the first row, type
Root in the Node Name column. Select Node Type
Element. Select Source Type
Text.
On the next row, Type
GenJournal in the Node Name column. Select Node Type
Element. Select Source Type
Table. In the Data Source Column, click on the Arrow pointing up and locate table
81 – General Journal Line, select it and click OK.
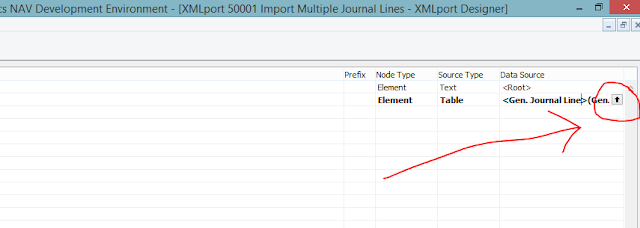 |
| Fig 3: XMLPort - General Journal Line |
On the next row, Select Node Type - Element. Select Source Type - Field. Select. In the Data Source Column, click on the Arrow pointing up, select Journal Template Name and click OK.
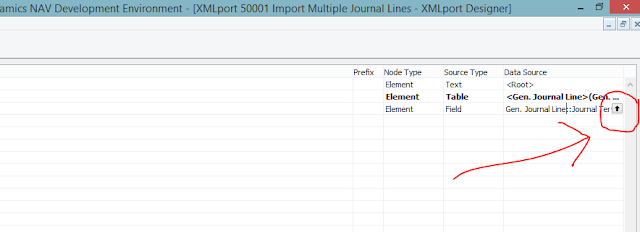 |
| Fig 4: XMLPort - Journal Template Name |
Follow the previous step and add the rows: Journal Batch Name, Line No., Account Type, Account No., Posting Date, Document Type, Document No., Description, Amount, Bal. Account Type, and Bal. Account No. Fill in the Node Names for the different rows: JournalBatchName, LineNo, AccountType, AccountNo, PostingDate, DocumentType, DocumentNo, Description, Amount, BalAccounttype and BalAccountNo.
Ensure the items are indented as seen in the image. The Root has indentation 0, GenJournal has indentation 1 and the rest of the rows have indentation 2.
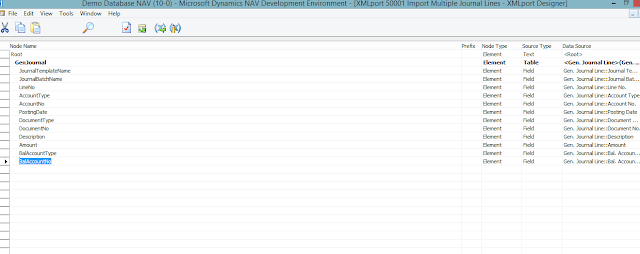 |
| Fig 5: XMLPort |
The order of the fields in the XMLPort Design window will be the exact order in the csv file that we shall create later on.
Move the cursor below the last row and click the Properties Icon.
Under the Format Property, select Variable Text.
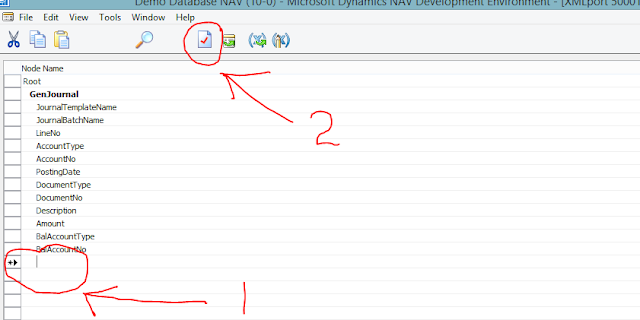 |
| Fig 6: XMLPort - Properties |
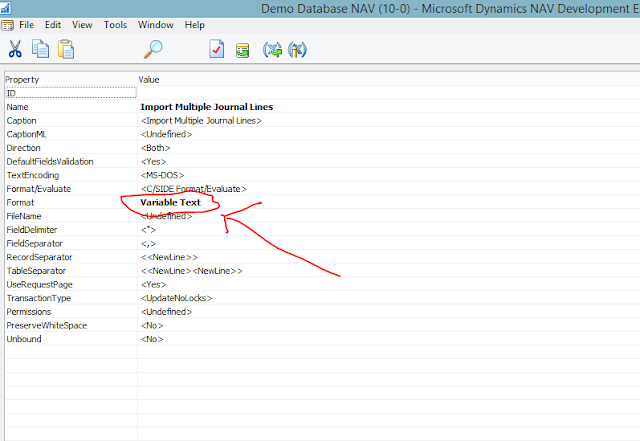 |
| Fig 7: XMLPort - Variable Text |
Save the object such as ID – 50001 and Name – Import Multiple Journal lines. Ensure it is Compiled.
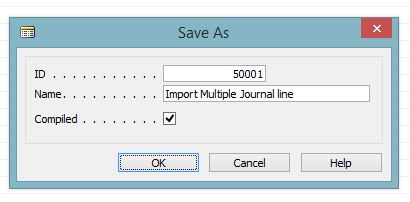 |
| Fig 8: XMLPort - Save |
You will then add this object to the payment journal page - 256. From the development environment, click Page. Select Page 256 – Payment Journal and click Design.
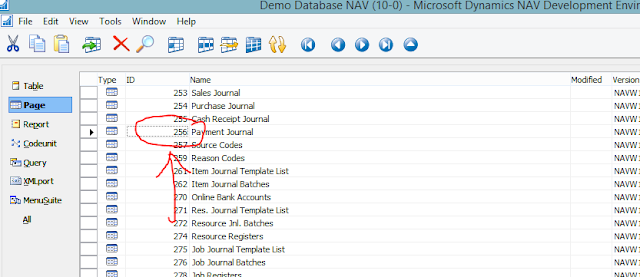 |
| Fig 9: Payment Journal - 256 |
Click View and select Page Actions
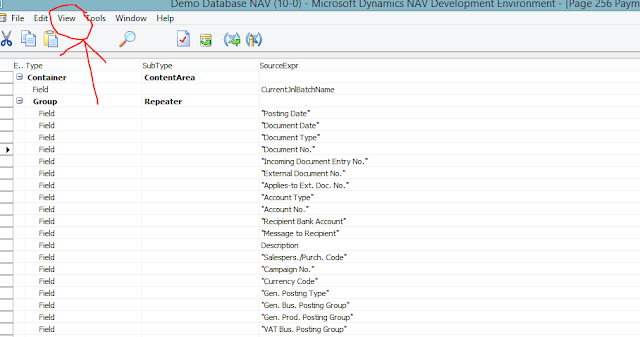 |
| Fig 10: Payment Journal - Page Actions |
Under ActionGroup Funtions add another row below the last Action in the group.
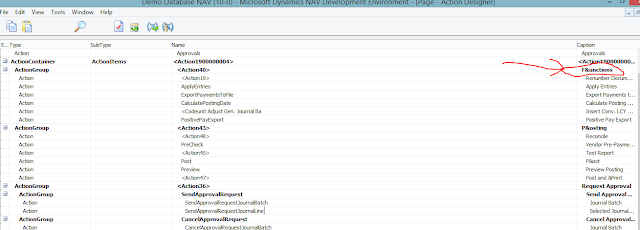 |
| Fig 11: Page Actions |
Specify the Name of the Action – Import Payment Journal. With this Action Selected, click the Properties icon.
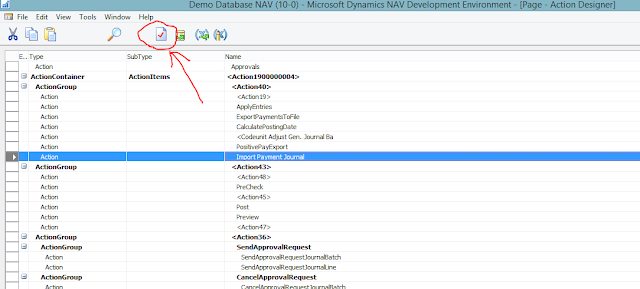 |
| Fig 12: Page Actions Properties |
From the Properties window, fill in Process in the Image Property and XMLPort 50001 in the RunObject Property.
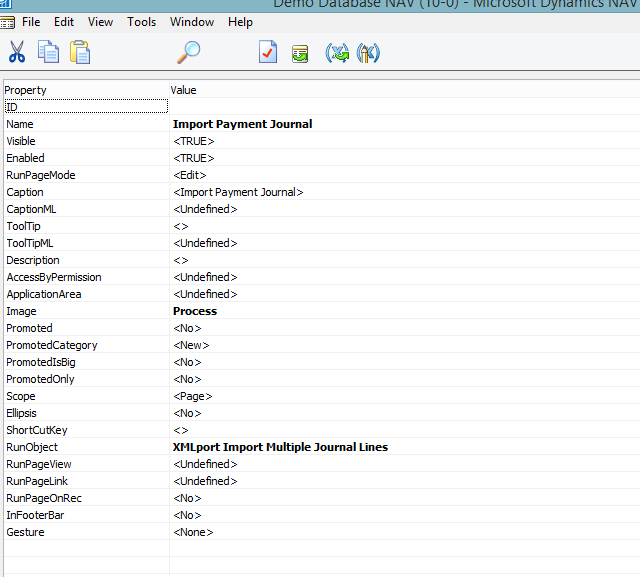 |
| Fig 13: XMLPort Properties |
Click in the field below RunObject and then save the page object.
Login to Microsoft Dynamics NAV client and go to Payment Journals. Select the Payment Journal Batch BANK. Under Actions tab, you should be able to see the Import Payment Journal XMLPort.
Click Import Payment Journal XMLPort. If this is the first time to run the XMLPort, you will have to Export the Excel Template. This is the template in which you will fill in the multiple journal lines. From the Import Payment Journal window, select Direction: Export and click OK, click Save and specify where you want to save the excel / csv format file. Save the file as csv.
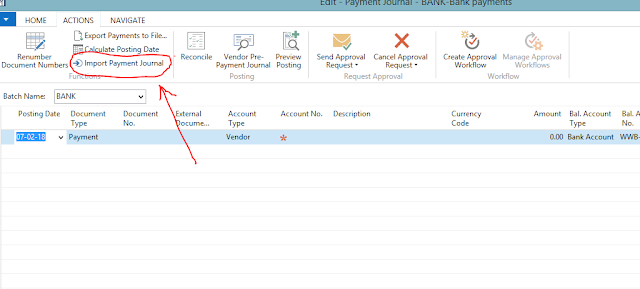 |
| Fig 14: Payment Journal - BANK |
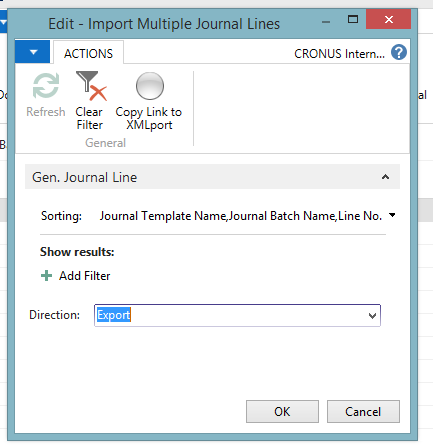 |
| Fig 15: Import Journal lines |
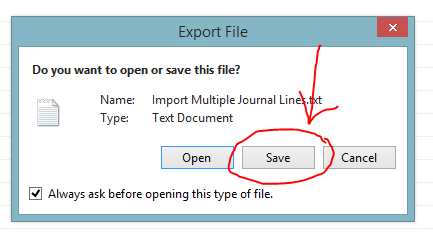 |
| Fig 16: Import Journal lines - Save |
 |
| Fig 17: Save as csv |
Open the csv file and delete any data in the file. Fill in the multiple journal lines and save the file.
You will observe the order specified is the same exact order in the XMLPort designer that we created earlier on.
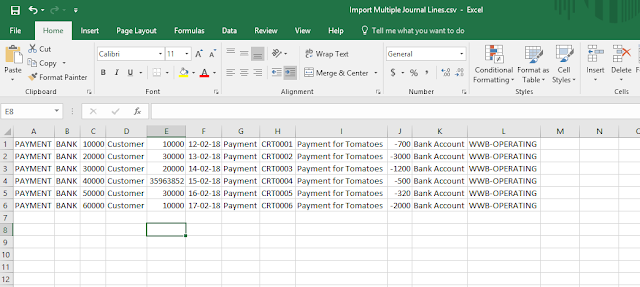 |
| Fig 18: File as csv |
Order of the columns is as follows:
- Journal Template Name
- Journal Batch Name
- Line Number
- Account Type
- Account Number
- Posting Date
- Document Type
- Document Number
- Description
- Amount
- Balance Account Type
- Balance Account Number
To import the file in Microsoft Dynamics NAV, go back to the payment journal page and click Import Payment Journal and select Direction: Import. Select the csv file you saved and click OPEN. This will populate the payment journal batch BANK with the journal lines. Close the BANK journal batch and re open it. You should be able to see the journal lines.
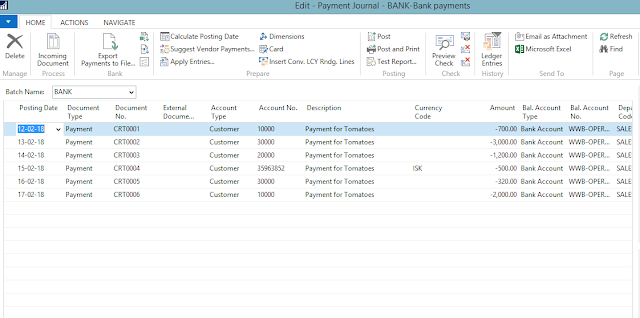 |
| Fig 19: Payment Journal lines |
However, if you have journal lines already in the batch BANK that you are importing the journal line to, you will receive an error on importing the journal lines. There fore ensure that you have deleted all journal lines from the journal batch BANK.
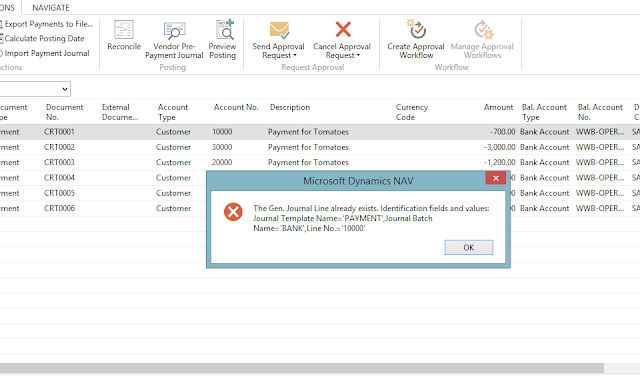 |
| Fig 20: Payment Journal lines - ERROR |
At this point, you can post the journal lines.


import records Thank you because you have been willing to share information with us. we will always appreciate all you have done here because I know you are very concerned with our.
ReplyDelete